






How to Build a Timber Deck: A Step-by-Step Installation Guide

Building your own deck is one of the most rewarding renovation projects a homeowner can take on. Done well, timber decking adds usable outdoor living space, boosts kerb appeal, and can genuinely increase the value of your property. But how to build a timber deck properly takes more than a stack of boards and a weekend of enthusiasm. Getting the planning, framing, and fixing right the first time is what separates a deck that lasts decades from one that starts sagging within a few years.
This guide walks through the full process, from initial planning through to the finishing touches, so you know exactly what’s involved before you pick up a drill.
1. Initial Planning and Pre-Construction Considerations
Every solid deck starts on paper, not on site. Before you buy a single length of timber, work through these planning basics.
Location & Orientation
Think about sun exposure throughout the day, prevailing winds, and how the deck will connect to your home’s existing entry points. A north-facing deck might be brilliant for entertaining but will need shade in summer; a shadier spot might suit a quiet reading nook better than a full outdoor kitchen.
Size & Intended Use
A deck for a barbecue and a small table needs far less than one designed for larger gatherings. As a rough guide, allow at least 3.6m x 3.6m for a dining setup with room to move chairs comfortably.
Council Approvals and Local Regulations
Council regulations typically govern setback distances from boundaries, height above ground level, and whether a permit is required. Decks over a certain height (often 1 metre) or attached to the dwelling usually require approval from the council or a building surveyor in Victoria.
Bushfire Attack Level (BAL) Compliance
If your property is situated in a bushfire-prone area, your deck must comply with Australian Standard AS 3959. Depending on your home’s BAL rating (ranging from BAL-Low to BAL-40 or BAL-FZ), you may be required to use specific fire-rated timbers (such as Spotted Gum, Blackbutt, Ironbark, or Silvertop Ash) and non-combustible framing or sub-floor enclosures.
2. Tools, Materials, and Timber Selection
Before construction begins, make sure you’ve got the right kit on hand. A typical DIY timber decking installation requires:
Essential Tools
- Circular saw and drop/mitre saw
- Stakes, tape measure, spirit level, speed square, and string/chalk line
- Cordless drill and driver bits
- Post hole digger or auger
- Concrete mixing tools (for footings)
- Spade, shovel, and wheelbarrow
- Safety gear such as glasses, gloves, and ear protection
Materials:
- Bearers and joists (H3 or H4 treated pine, or appropriate hardwood)
- Decking boards in your chosen species
- Pre-mixed concrete for footings
- Stirrups, joist hangers, and bracing brackets
- Decking screws or a concealed fixing system
- Timber oil or decking finish
3. Preparing the Site and Establishing the Foundation
A deck is only as strong as what’s underneath it.
- Clear the Site: Remove topsoil, vegetation, debris, and rocks from the deck footprint.
- Set Out the Layout: Use timber stakes and string lines (hurdles/profile boards) to establish the precise perimeter of your deck. Apply the 3-4-5 rule (Pythagoras’ theorem) to ensure all corners are perfectly square.
- Dig Post Holes: Mark out post locations according to your framing plan. Dig post holes below the topsoil layer down to solid ground (typically 300mm to 600mm deep depending on soil type and deck height).
- Install Stirrups and Posts: Fit galvanised post stirrups into the holes, pour concrete around them, and use a spirit level to ensure they are plumb. Allow the concrete to cure fully according to the manufacturer’s instructions before applying heavy loads.
4. Installing Bearers, Joists, and the Structural Frame
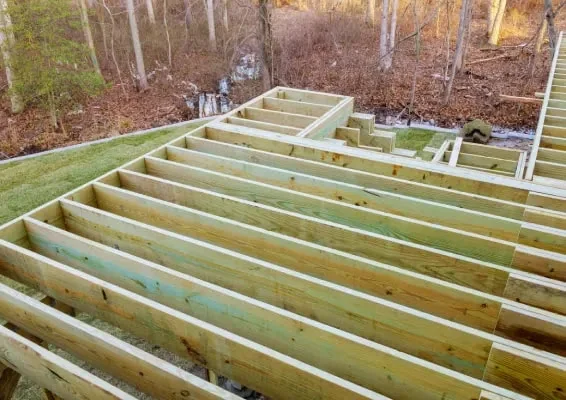
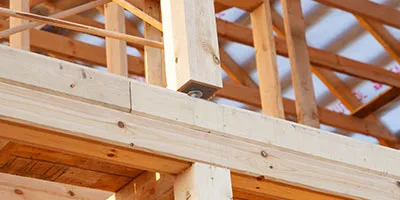
Framing forms the backbone of your deck. Understanding how to frame a timber deck correctly ensures load distribution and long-term stability.
Installing Bearers
Bearers rest directly on top of, or are notched into, the vertical timber posts.
- Level the bearers using a long spirit level or laser level.
- Secure them to post stirrups or posts using galvanised bolts or structural timber screws.
- Ensure a slight fall away from the house (approx. 1:100) to allow adequate water drainage away from your home’s foundation.
Installing Joists
Joists sit perpendicular to the bearers, providing direct support for your decking boards.
- Space joists according to the thickness and timber species of your decking boards (typically 450mm centres for 19mm thick residential boards, or 400mm for high-traffic or commercial applications).
- Fix joists to bearers using skew nails, framing screws, or metal triple-grips/joist hangers for optimum strength.
- Ensure clear ventilation space underneath to prevent moisture buildup.
5. Installing Timber Decking
Once your frame is solid, you can start installing your timber decking boards. Some notes to remember are:
- Begin at the house’s edge and work outward. To secure the first board perfectly straight, use a string line as a guide.
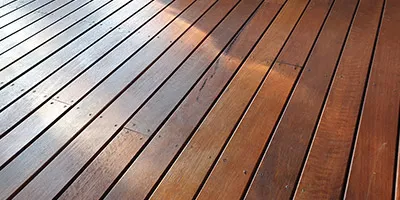
- Use spacers to maintain consistent gaps between boards to allow for natural movement and drainage (5- 6 mm).
- Secure boards using two grade 304 or 316 stainless steel decking screws at every joist intersection.
- Pre-drill hardwood boards before fixing to prevent splitting, particularly near the ends.
- Stagger board joins where possible for a cleaner finish, and check alignment regularly with a string line as you go, since small errors compound quickly across a large deck.
- Concealed fixing systems are worth considering if you want a clean, screw-free surface finish.
6. Finishing Touches
To transform your structure into a completed architectural feature, focus on the finer details:
- Fascia Boards and Edging: Frame the outer perimeter with matching fascia boards to conceal the sub-frame and structural joists.
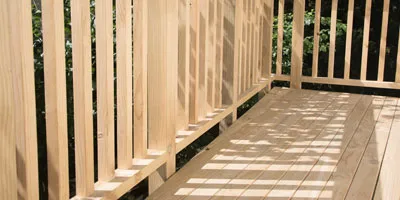
- Stairs and Handrails: If your deck is elevated more than 1 metre above the ground, standard building codes require the inclusion of safety balustrades or handrails (at least 1m high, with gaps no larger than 125mm).
- Final Surface Treatment: Sand any rough edges or exposed joins. Clean the timber thoroughly using a dedicated deck cleaner to remove tannins, surface dirt, and mill scale. Once dry, apply 2–3 coats of high-quality timber oil, stain, or protective finish.
Common DIY Decking Mistakes and How to Avoid Them
Even experienced DIYers can make mistakes during a step-by-step deck installation guide. Here are the top errors to avoid:
| DIY Decking Mistake | Consequence | How to Avoid |
|---|---|---|
| Poor Foundations | Structural shifting, sinking posts, uneven levels, and potential deck collapse. | Dig footings to the correct depth for your soil type, use concrete footings, and ensure posts are securely anchored in galvanised stirrups. |
| Inconsistent Board Spacing | Boards buckle when wet or leave large gaps when dry. | Use 4–6mm plastic spacers during installation. |
| Incorrect Fasteners | Rust stains and loose boards. | Use outdoor-grade galvanised or stainless steel screws. |
| Skipping Pre-Drilling | Split timber ends. | Always pre-drill and countersink screw holes near board edges. |
| Poor Drainage Falls | Decks built dead flat (or worse, sloping toward the house) trap water and accelerate rot. | Build deck with a 1–2 mm angle away from the house to assist with water runoff. |
Timber Deck Maintenance Tips
To maximise the life of your timber deck and keep it looking fresh through Australia’s tough seasons, adopt a regular maintenance routine:
- Regular Cleaning: Sweep away leaves and dirt weekly. Wash the surface with a mild detergent and stiff broom every few months to remove organic buildup.
- Annual Inspection: Check for loose fixings, protruding screws, or signs of dry rot in moisture-prone zones.
- Re-Coating Schedule: Re-apply timber oil or protective finish every 12 to 18 months, or whenever the timber begins to look dull, and water stops beading on the surface.
Why Choosing Quality Timber Matters
Every step in this guide relies on one foundation: the quality of the timber itself. Premium, correctly graded and treated timber resists warping, splitting and decay far better than lower-grade alternatives, which means fewer repairs, less maintenance, and a structure that stays sound for longer. It’s also easier to work with; straighter boards, cleaner cuts, and more predictable fixing behaviour all add up to a smoother build.
At Greenhill Timbers, we supply an extensive range of sustainably sourced, high-grade decking timbers engineered to withstand Australia’s harsh climate. Here is how our most popular decking species compare:
Spotted Gum
- Appearance: Striking natural colour variations ranging from pale greyish-browns to rich, deep red-browns, often featuring a distinct wavy or fiddleback grain.
- Durability & Performance: Extremely dense, tough, and durable (Class 1 above ground). It experiences minimal shrinkage and movement compared to other species.
- BAL Rating: Naturally fire-resistant, making it suitable for bushfire-prone areas up to BAL-19 and BAL-29.
Merbau
- Appearance: Warm, deep reddish-brown tones that weather into a soft silver-grey over time if left untreated.
- Durability & Performance: A highly popular, reliable Class 2 hardwood offering excellent natural resistance to decay and termites at an accessible price point.
- Note: Merbau naturally contains high levels of tannins, which bleed when wet. It requires thorough washing and sealing before or immediately after installation.
- BAL Rating: Approved for BAL-12.5 and BAL-19 applications.
Blackbutt
- Appearance: Elegant, modern aesthetics featuring neutral light brown to golden straw tones with a consistent, straight grain.
- Durability & Performance: High-density Class 1 timber with exceptional structural strength, making it ideal for high-traffic residential and commercial decks.
- BAL Rating: One of the top choices for fire-prone regions, rated for BAL-12.5, BAL-19, and BAL-29.
Ironbark
- Appearance: Ranges from deep crimson reds (Red Ironbark) to pale browns and rich chocolate tones (Grey Ironbark).
- Durability & Performance: One of the hardest and densest hardwoods available in Australia (Class 1 above ground). It offers superior resistance to heavy impact, wear, termites, and extreme weather.
- BAL Rating: Naturally fire-retardant and rated up to BAL-29.
Silvertop Ash
- Appearance: Warm ash-brown to pale amber tones featuring natural character marks like gum veins and subtle insect tracks.
- Durability & Performance: A Class 2 hardwood that takes stains and protective oils exceptionally well, providing a relaxed, coastal aesthetic.
- BAL Rating: Compliant for bushfire-prone areas up to BAL-29.
Treated Pine (H3)
- Appearance: Pale yellow with a light greenish tint from the preservative treatment. It easily removes stains, paint, or oil and matches any colour scheme.
- Durability & Performance: A lightweight, highly economical softwood treated to H3 hazard level to resist fungal decay and termite attacks. While easy to cut and install, it requires consistent maintenance (cleaning and re-sealing) to prevent cupping and warping over time.
- BAL Rating: Generally suitable for BAL-Low regions unless wrapped or treated with specific fire-retardant coatings.
Get Expert Advice Before You Start
Knowing how to build a deck in Australia involves a genuine mix of planning, structural know-how, and the right materials suited to your local conditions. If you’re unsure which species, board size or fixing system suits your project, or you simply want a second opinion before you order, our team is happy to talk through your plans and help you choose materials that will stand the test of time.